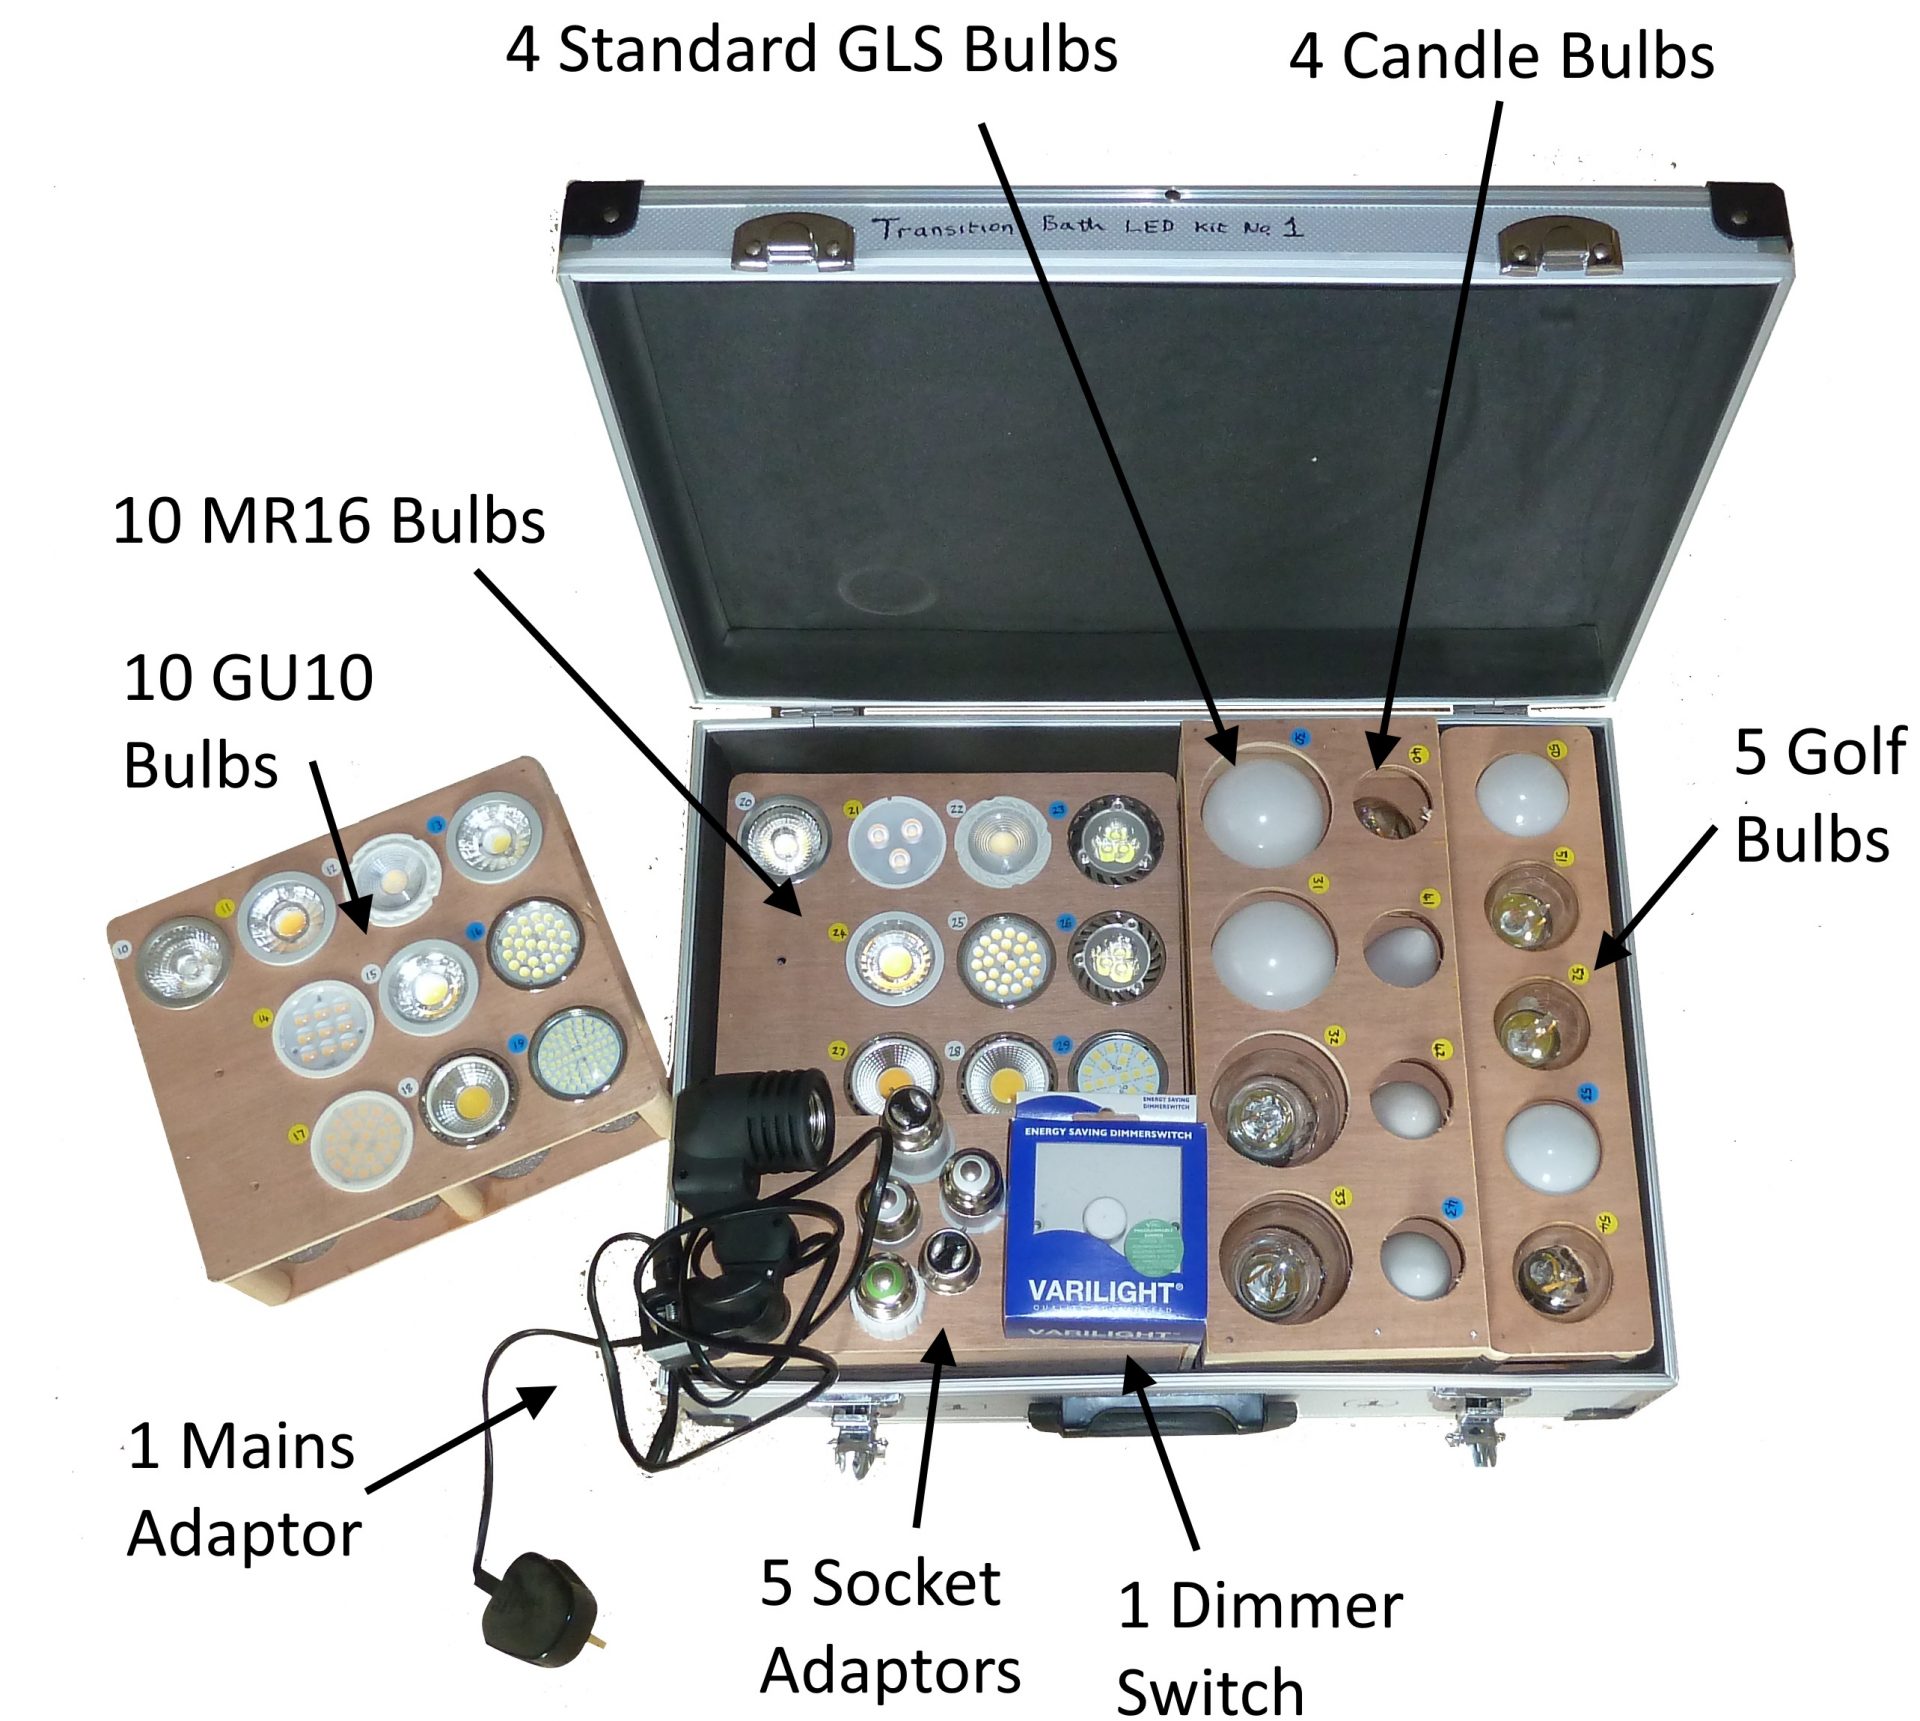
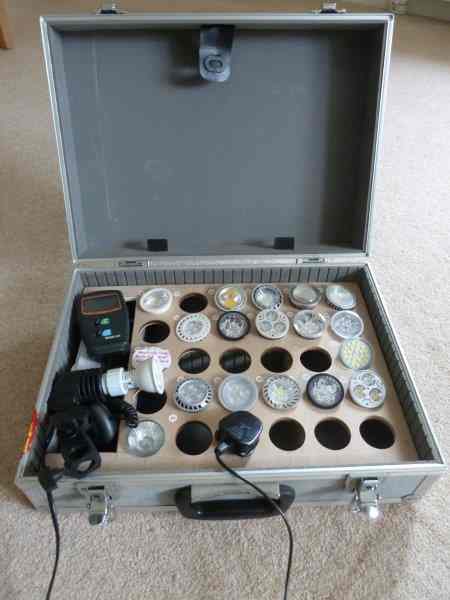
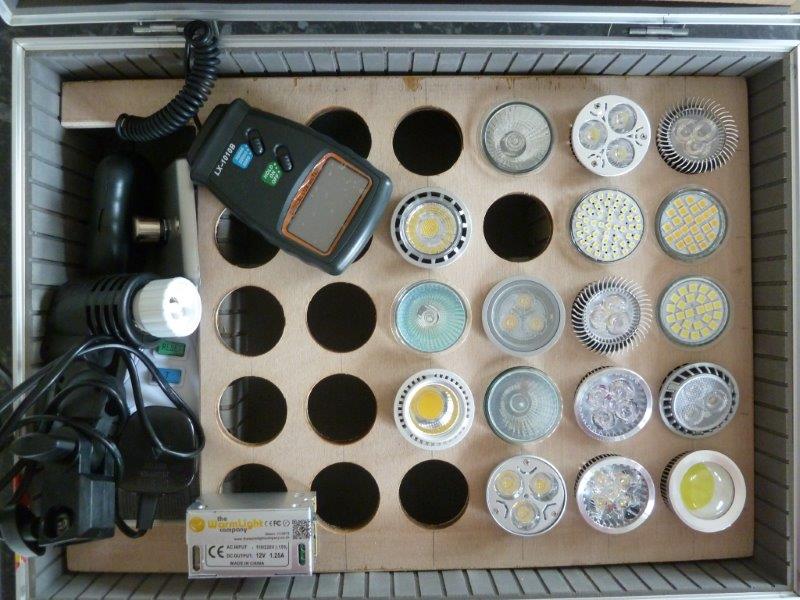
Transition Bath’s ‘Try Before You Buy’ LED lighting project allows you to borrow a kit of LEDs from Bath’s Central Library. The kit contains approximately 40 different LED downlighter bulbs (GU10 and MR16) bulbs which you can try in your home before making a purchase.
Modern LED bulbs can be just as bright as halogens but use 10% of the electricity. Unlike halogen bulbs, LED bulbs come with a potentially bewildering range of characteristics which put prospective purchasers off. Low power bulbs from a few years ago have also deterred people from purchasing, but recent LEDs are as bright if not brighter than the halogens they are replacing. This kit hopes to persuade you to switch, and not only save on average £75 from your annual electricity bill but reduce carbon emissions.
The rest of this webpage hopes to guide you through the process, but if you have any further questions not covered here, please contact us at ledlighting@transitionbath.org and we will do our best to help.

What to do next
- Read: Briefly read through this web page to get a feel for what is required, or if you are in a hurry read the printed instructions provided with the kit
- Book: Book the kit out from the library:
- The kit is part of the library ‘Special Loans Collection’ which means it can’t be booked online and cannot be moved to other libraries
- To book the kit phone Council Connect on 01225 39 40 41 or go to Bath Central Library and ask to book the ‘Transition Bath LED Try-before-you-buy kit’
- You will need your library card number to book the kit
- Try to book the kit for the minimum period possible to maximise access to the kit as we are expecting significant demand and we would like as many people as possible to switch to LED lighting; the maximum booking allowed is for one week
- Collect: Go and pick the kit up from the library:
- Bring your library card with you
- The kit weighs 9 kg, the case has a comfortable carrying handle but if you are not confident about carrying 9 kg over home please make arrangements to pick it up by public transport or by car (the kit has already been carried tens of miles by hand, so its not that bad!)
- Try: Having got the kit home, go through the “LED Kit Bulb Selection Tool” below to decide which bulbs fit your criteria and try them in your light fittings, or use the provided standalone socket (GU10 bulbs only). If you find the guide below too long or complicated, just try some of the example bulbs from the kit to see which you like?
- Buy: The kit currently contains LEDs from 4 suppliers: Light Rabbit, LEDHut, LEDStop and Well-Lit which we recommend for the level of their customer service, quality of their LEDs and product guarantees
Summary
When you purchase a halogen bulb there is very little choice, typically the choice is between a 35 watt and a 50 watt bulb and if you are really lucky a choice of ‘beam angles’. When you select an LED bulb you are presented with a plethora of criteria:
| Criteria | Description | |
| Type: GU10 or MR16 | There are 2 different types of bulbs, with different electrical connections. The GU10 has ‘rounded connectors’ whereas the MR16 has ‘spikes’. They work at different voltages and generally GU10’s are easier to replace. There are specific sections below for each bulb type. To determine which bulb you have you will need to remove one of the existing bulbs. There are separate sections below covering replacing GU10 and MR16 bulbs. | |
| GU10 (240 V mains) | MR16 (12V AC/DC) | |
 |
 |
|
| Colour temperature | LED vary in colour from a warm yellow similar to existing halogen or incandescent bulbs through to a blueish white. They are often descriptively termed “warm white, “day white”, “cool white”, sometimes their ‘temperature’ is expressed in kelvin – typically range from 2700K to 6500K. It is a matter of personal preference what colours you choose, but typically colder/bluer colours are used for more active rooms e.g. a kitchen and warmer colours are used in more relaxing rooms e.g. a lounge. Most LED designs are available in at least 2 colour temperatures. | |
| Beam angle | This varies from 15 degrees for a spot light to 1200 for a wide floodlight. Existing halogen’s are typically 380. Matching the beam angle, to the spread of lights in the ceiling and their impact on the working surface is important. | |
| Depth of bulb | Standard halogens are 50mm across and 50mm deep. LEDs match the halogens for width but can vary in depth from 50mm to 85mm. This is because LEDs need more space for electronics and cooling in the base of the bulb. Generally LEDs fit most existing fittings, but there are some fittings which can’t cope with the deepest LEDs – use the kit to check. Also the lens on some LEDs are slightly proud of the bezel which may mean they are incompatible with some fittings. | |
| Dimmable | If your lighting circuit has a dimmer, only some bulbs are dimmable, and even then older dimmer switches quite often don’t work with dimmable LED bulbs. Try the bulbs from the kit first. | |
| Lumens (brightness) | This is the light output of the light. Typically 50W halogen gives an equivalent light output to a 400 lumen LED. So look for an LED with at least 350lumens, although given most LEDs have similar efficiencies a simpler criteria might be to pick an LED which uses between 4.5 watts and 8W. Beware: some DIY stores sell LED lights with insufficient lumen outputs e.g. < 250 lumens. | |
| CRI (colour quality) | Colour Rendition Index – this is the quality of the colour produced by the bulb, a value of 80 or greater is good | |
| Quality of construction | Some bulbs are made of cheaper and flimsier pressed aluminium, some from higher quality cast aluminium. Generally you get what you pay for, so if you purchase cheap bulbs from ebay they are likely to be pressed aluminium, if you purchase from reputable online suppliers they are more likely to be cast – the kit contains a mix of different types and you will understand the difference when you handle them. Although because you are only likely to handle them once when installing them the quality of the construction probably doesn’t matter, it might however indicate the quality of the internal electronics and therefore how long the bulbs will last. | |
| Longevity | LEDs are typically quoted with lifespans of 25,000 (35yrs) to 50,000 hours (70yrs) significantly more than halogen’s 2,000 hours (2.5 yrs) (figures in years assume 2 hours usage per day). i.e. longer than you would expect to live in a house. However, in our experience some batches of LEDs only last perhaps 5,000 hours, so they don’t always live up to expectation. If you are worried how long they last, go to a reputable in-line supplier who is likely to offer a 3 to 5 year guarantee with the bulb. | |
| Technology | There are 3 main technologies of LEDs: SMD, COB and normal. These terms are explained in a section below – the main difference is that the type often effects the beam angle, so most SMD type bulbs only come in wide beam angles. | |
| Cost | Cost varies from £1 to £15 for an LED downlight. It is up to you how much you want to spend and there is not always a correlation between how much you spend and the quality of the end product. However a reputable online supplier should provide a long guarantee. | |
Generally only the first five criteria on the list – GU10 or MR16, colour temperature, beam angle, depth of bulb and dimmable are critical when selecting a bulb. Generally bulbs rated 4.5 watts or above should be bright enough. Hopefully the range of bulbs in the kit should facilitate you in making this decision?
The remainder of this section covers some of the criteria in more detail.
GU10 and MR16 are the names used to describe the two main types of downlighter LED.
GU10s
The GU10 is powered directly from the mains and comes 2 rounded nurled connectors as per the example to the right.
The LED chips which provide the light all run off low voltage, so the for the GU10s the neck of the bulb contains a small transformer, which transforms the mains voltage down to a lower ~5V DC. This is largely why some GU10s are deeper/longer (up to 85mm) than their equivalent halogen’s as they need extra space to fit in the transformer. Most fittings allow some latitude in bulb depth but you will need to check this against your light fitting. To some extent a longer necked bulb might mean a more reliable bulb as the electronics in the transformer might have more space and therefore will get less hot and last longer. Having said that most manufacturers are now managing to fit LEDs and their transformers into packages very close to the 50mm of the halogens they are replacing.
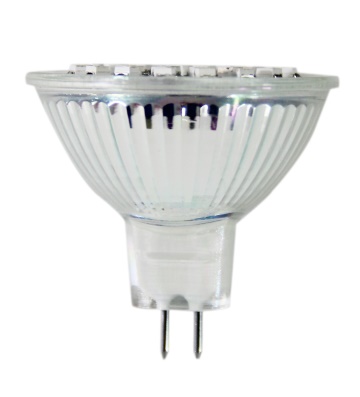
MR16s
MR16s have a slightly different connector – 2 pointed ‘prongs’ and are powered by 12V (DC). Rather than being supplied directly from the mains, these bulbs are connected to the mains via a transformer, which you is normally to be found in your ceiling void within a short distance of the light fitting.
Unfortunately many existing transformers are designed only to work down to 20 watts as they are designed to work with 50 watt halogens. As a result they don’t work with all LEDs which typically consume 5 watts. Luckily most modern LED MR16s can spoof the old transformers into working at a lower wattage but its very difficult to tell until you actually try the LEDs in the light fitting – this is one of the major benefits of our ‘try-before-you-buy’ kit! The most normal symptom of a transformer not being compatible with an LED is the light either flickers or doesn’t come on at all.
If you do find that none of the bulbs work with your transformers, please let us know: ledlighting@transitionbath.org and we will do our best to help. The most common solution if they don’t work is to rewire the lights with new LED compatible transformers. We would however advise that you consider changing the light fitting from a MR16 to a GU10, as it likely to be a cheaper solution, there is less wiring involved and we have noticed that the GU10s are more efficient than the MR16s as it appears that in general both old and new transformers consume 1 to 2 watts beyond the wattage quoted for the bulbs, reducing some of the benefit of switching to LEDs.
The image below tries to summarise what is involved if you find your existing transformers won’t work with any of the LED bulbs:
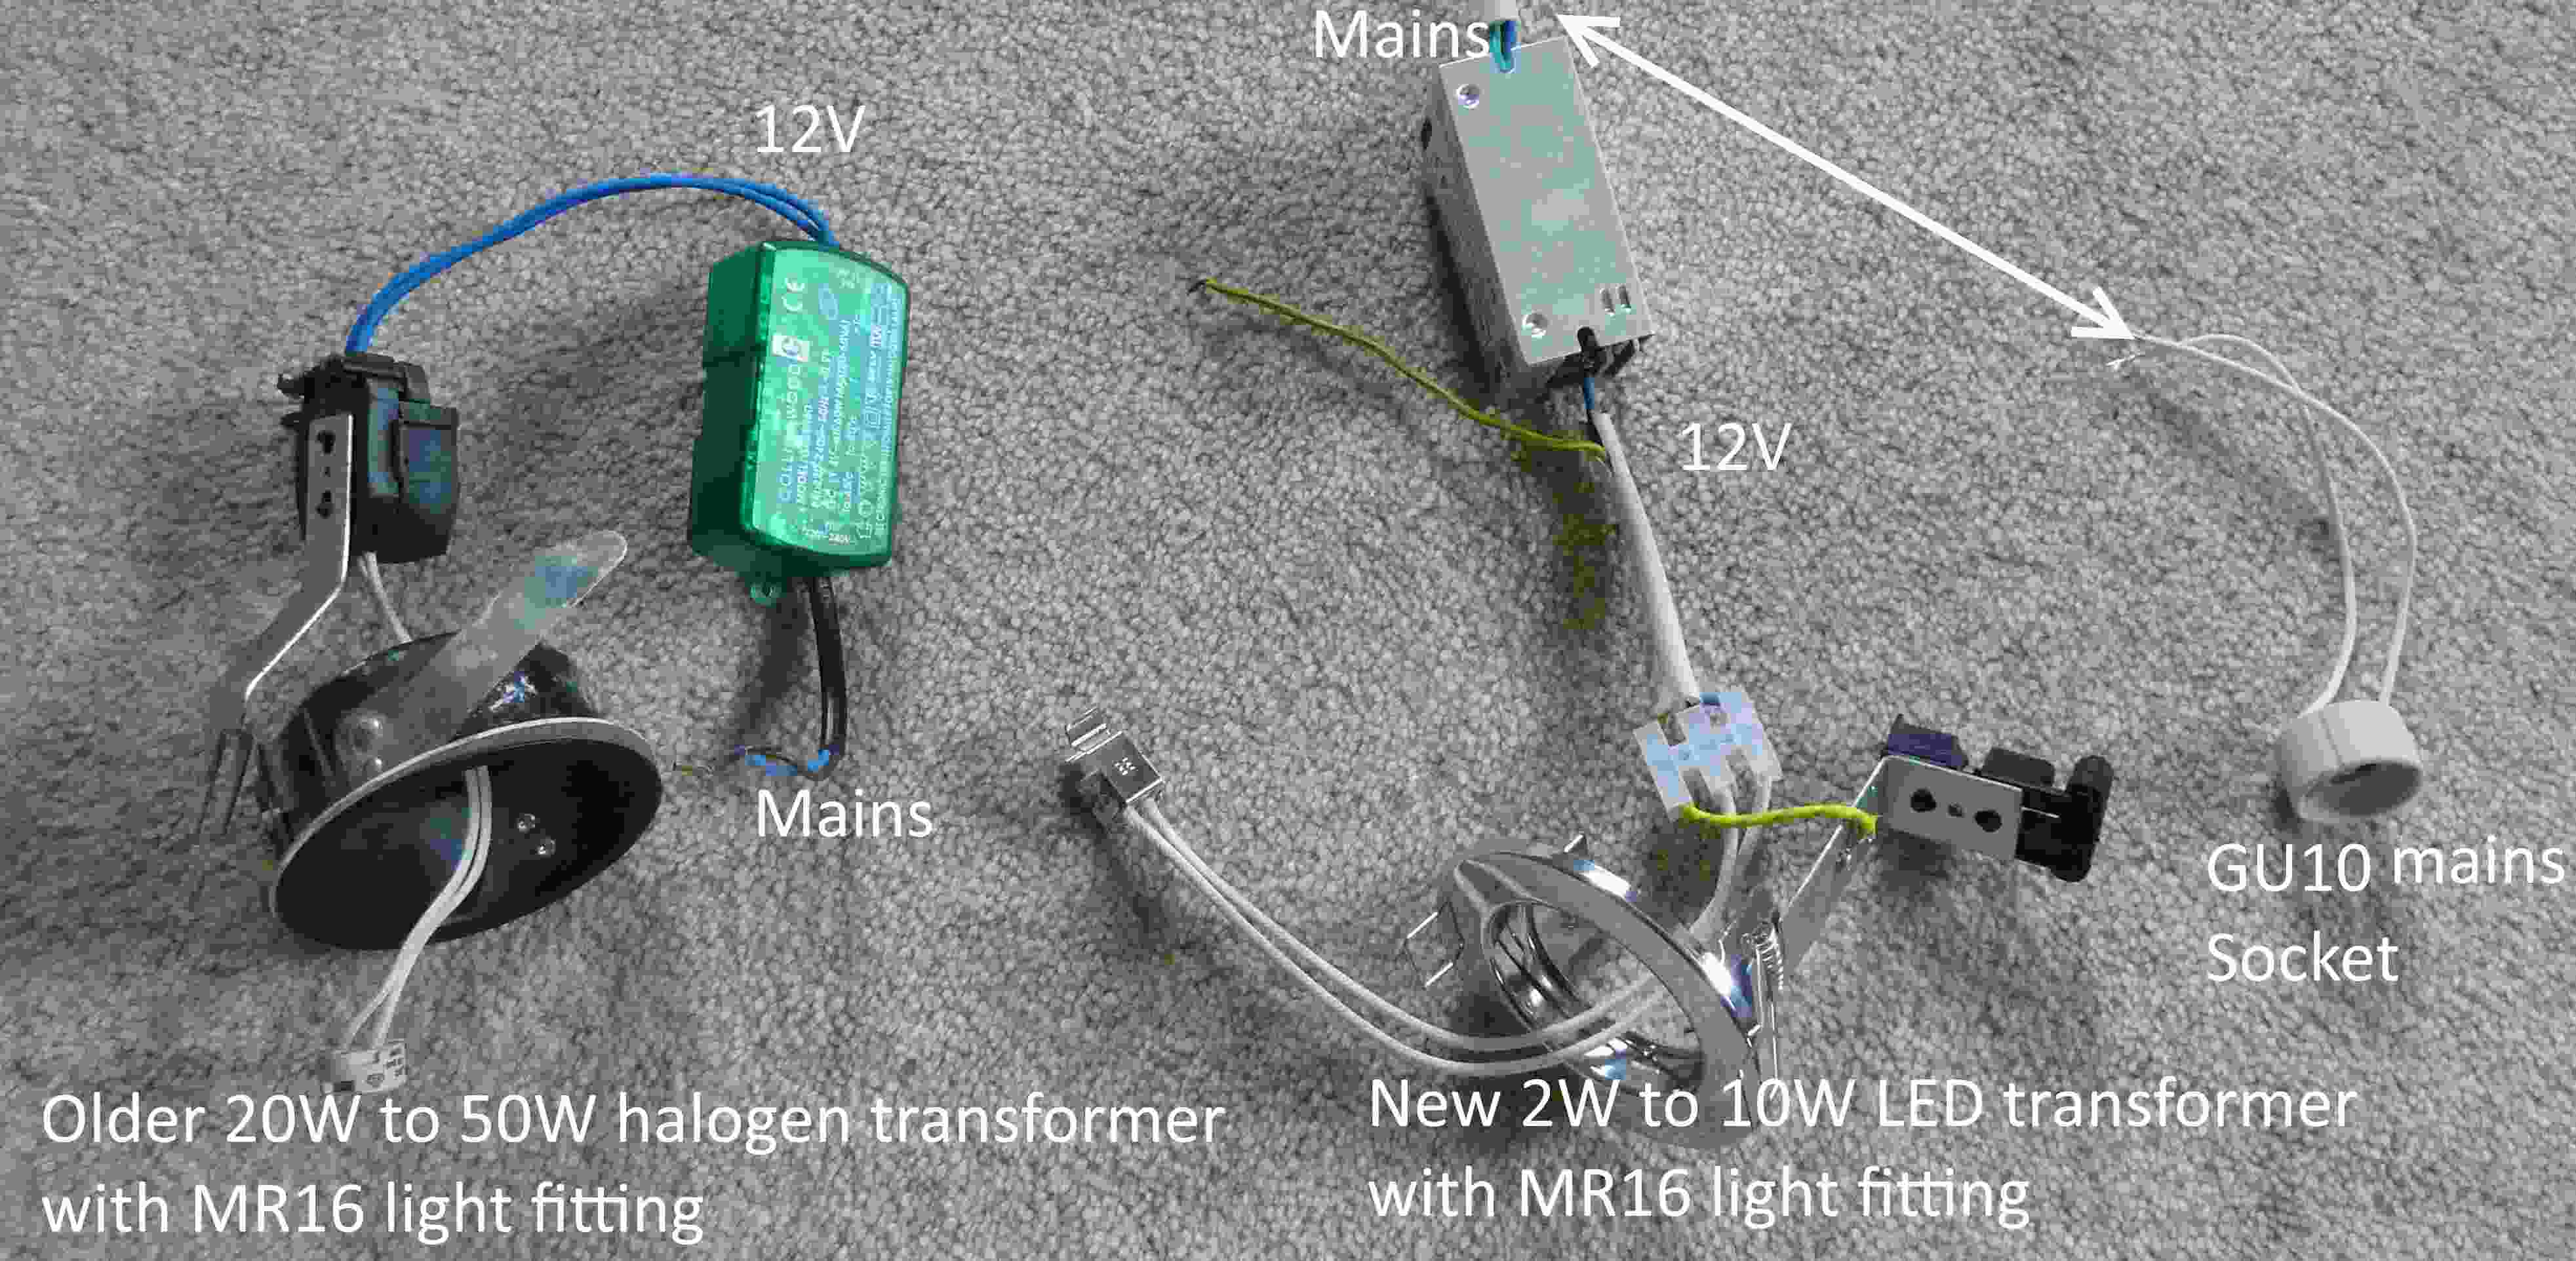
Your original transformer will probably look something like the one of the left, you then have a choice of replacing the transformer with an LED compatible transformer (middle, unwire 2 x 3 wire and rewire ~ £8 for transformer) or to replace the MR16 socket with a GU10 mains socket and wire directly to the mains removing the transformer from the circuit altogether (unwire and rewire 1 x 3 wires £1 for socket, £0 or 1 for a junction box). If you run into this situation we are happy to provide advice.
LED Types: SMD, normal or COB
There are three main types of LED packaging:
| SMD(Surface Mount Device) | Normal | COBChip on Board |
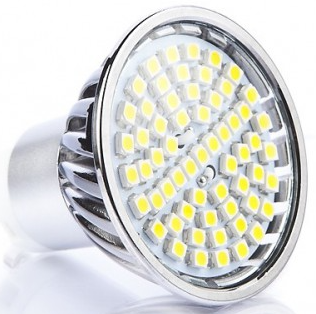 |
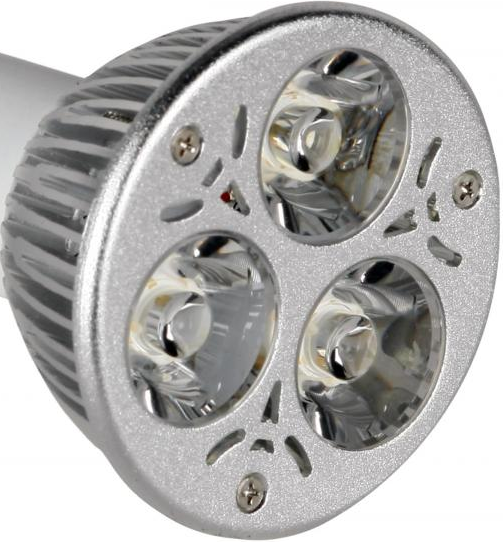 |
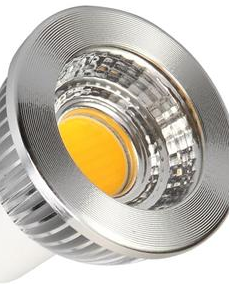 |
| Lots of small LEDs mounted on the surface of the device | Between 1 and 7 LEDs mounted behind lenses | A single orange or yellow disk with LEDs embedded behind |
| Typically have very wide beam angles, and the cheaper end of the market. Generally very compact 50mm deep packaging. | The most common bulb, best value, range of beam angles | The most recent innovation in LED lighting. May give a more consistent more homogeneous pattern of light. Generally more expensive. Not always available in narrow beam angles. |
There isn’t really much difference between the 3 types of bulbs, except the SMD bulbs generally onlt come in a wide ‘beam angle’ (see later on this page).
Beam Angle
https://www.easy-lightbulbs.com/images/guides/beam-angle/45.gif 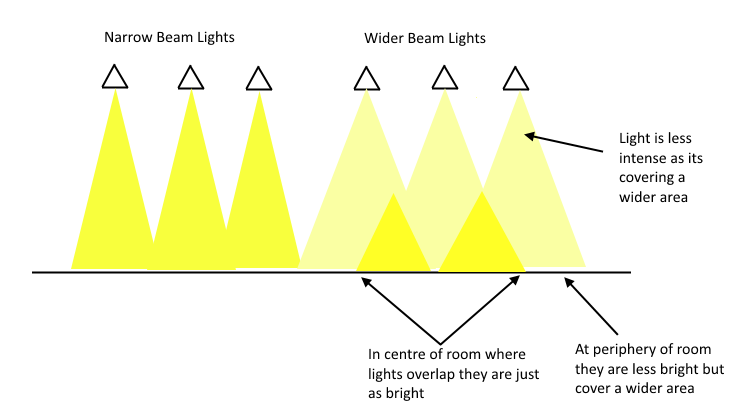
To further complicate the decisions the intensity of the light varies by 50% between the centre and outside of lights, for both halogens and the differing types of LEDs. Therefore when checking beam angles it is probably best to test empirically using the examples in the kit, it is very difficult to do it on theoretically. You should be particularly careful if you have work surfaces which need illuminating on the periphery of a room.
Colour Temperature
LED bulbs vary in ‘colour temperature’ from ‘Warm White’ (yellow) through ‘Day White’ (like daylight) to ‘Cool White’. These temperatures are generally quantified in ‘Kelvin’ (K), so a ‘Warm White’ bulb might correspond to 2700K to 3000K. Halogen bulbs are ‘warm’ and about 3000K. Colour is a personal choice but generally you want bluer colours in ‘active’ rooms like a kitchen and warmer yellower colours in ‘relaxing’ rooms like lounges and bedrooms. The chart below illustrates this:
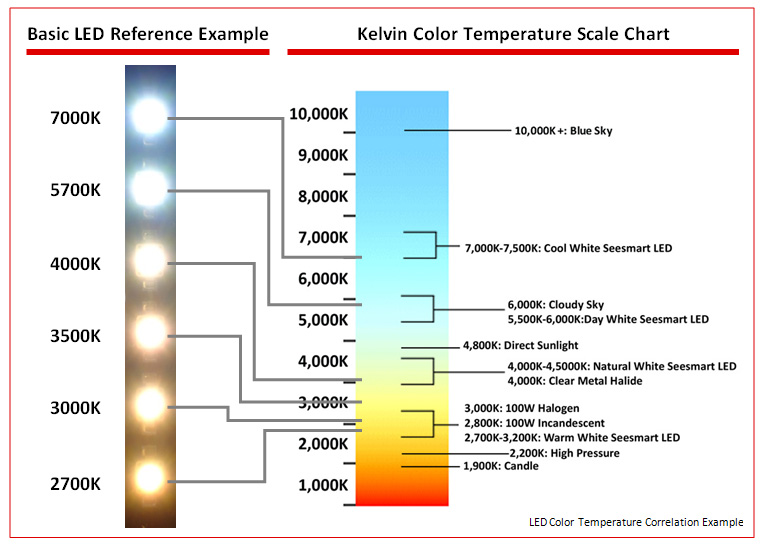
Generally warmer LEDs are slightly less bright than colder/bluer LEDs because the warmer LEDs are produced by coating the whiter LEDs with phosphorus which emits warmer colours but also absorbs some of the output from the white LED making it less efficient.